
Few foods deliver the same nostalgic comfort as a perfectly grilled cheese sandwich—crispy, buttery bread encasing rivers of melted, gooey cheese. But achieving that ideal balance of golden-brown crust and creamy interior requires more than slapping cheese between bread and tossing it in a pan. This comprehensive guide covers everything you need to know: choosing the best bread and cheese, mastering the foolproof cooking method, and exploring creative variations that transform this humble sandwich into something extraordinary. Whether you’re battling soggy bread or unmelted cheese, we’ll solve those problems and elevate your grilled cheese game.
What Makes the Perfect Grilled Cheese?
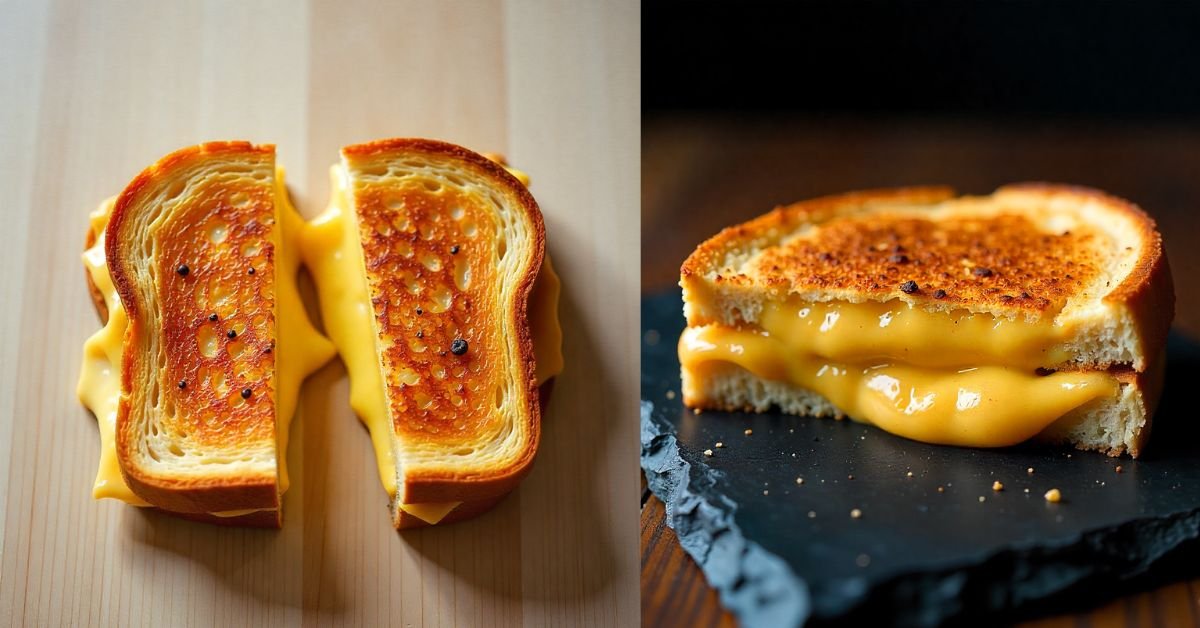
The hallmark of an exceptional grilled cheese sandwich is a crispy, golden-brown exterior that shatters when you bite into it, revealing a molten, gooey cheese interior that stretches in those coveted cheese pulls. The bread should be evenly toasted with no pale spots, while the cheese should be completely melted from edge to edge. Balance is everything—too much focus on browning the bread leaves you with cold, unmelted cheese, while being too timid with heat results in pale, soggy bread.
The Golden Rule: Low and Slow Cooking
The single most important technique for grilled cheese success is patience. Cooking over medium-low heat—around 275°F if you’re measuring—allows the bread to gradually turn golden and crispy while giving the cheese ample time to melt completely. Rushing the process over high heat causes the bread to burn before the cheese even begins to soften, leaving you with a disappointing sandwich with a charred exterior and cold, firm cheese inside.
Think of it like this: you’re not searing a steak. You’re gently coaxing both elements to reach their ideal state simultaneously. This “low and slow” approach takes an extra 2-3 minutes, but the result is worth every second of patience.
The Fat Factor: Butter vs. Mayo
This debate has raged in kitchens for years, and here’s the truth: both work beautifully, but they offer different advantages.
Butter is the traditional choice that delivers unmatched flavor. Its milk solids create that distinctive nutty, rich taste we associate with classic grilled cheese. Use softened butter for easy spreading that reaches all the way to the edges—this prevents dry corners. Salted butter adds an extra savory dimension, though unsalted works perfectly if you prefer to control the salt level.
Mayonnaise has gained popularity for good reason. Its higher smoke point means less risk of burning, and it spreads more easily straight from the refrigerator. Mayo also contains egg yolks and oil, which create an exceptionally crispy, golden crust with a subtle tangy note that some find addictive. The crispness factor with mayo is genuinely superior.
Our recommendation: If you’re new to grilled cheese, start with softened butter for traditional flavor. Once you’ve mastered the technique, experiment with mayo to discover which texture and taste you prefer. You can even use both—mayo on the outside for crispness, and a thin layer of butter on the inside for flavor.
Choosing Your Ingredients: A Guide to Bread & Cheese
The foundation of any great grilled cheese starts with selecting the right components. Not all breads toast equally, and not all cheeses melt the same way.
The Best Bread for Grilled Cheese (Ranked & Tested)
After extensive testing, here are the top performers:
Sourdough (Our #1 Pick): The tangy flavor of sourdough adds complexity that elevates the entire sandwich. Its sturdy, chewy texture holds up beautifully to generous amounts of cheese and butter without becoming soggy. The natural acidity also cuts through the richness of the cheese, creating perfect balance. Look for a rustic sourdough with a good crust—avoid the ultra-holey artisan varieties that can leak melted cheese.
Texas Toast / Thick-Sliced White Bread: When you want maximum crispy surface area and a soft, pillowy interior, thick-sliced white bread delivers. The generous thickness prevents sogginess and provides substantial structure for multiple cheese layers. Texas toast often comes pre-sliced at the ideal thickness and creates that diner-style grilled cheese experience.
Whole Wheat / Seeded Bread: A heartier option that pairs exceptionally well with sharp, strong-flavored cheeses like aged cheddar or gruyere. The nuttiness of whole grains complements robust cheese without competing. Just note that whole wheat browns faster than white bread, so watch your heat carefully.
Brioche / Challah (Use with Caution): These buttery, slightly sweet breads create an incredibly rich sandwich, but their sugar content means they brown—and burn—much faster than other options. If you choose brioche, reduce your heat to low rather than medium-low, and watch closely. The result is decadent but requires attention.
Sandwich Bread (White or Wheat): The classic choice works perfectly well, especially for kids or those who prefer a traditional taste. It’s mild, accessible, and won’t distract from the cheese. Just opt for quality bread rather than the ultra-soft, spongy varieties that can turn gummy.
The Ultimate Cheese Blend for Maximum Flavor & Melt
Here’s an insider secret from professional kitchens: the best grilled cheese sandwiches rarely use just one cheese. Creating a strategic blend gives you the melty texture, complex flavor, and dramatic cheese pull you’re after.
Think of cheese selection in three categories:
The Melter (Creamy, Gooey Base): These cheeses have excellent melting properties and create that essential creamy, gooey texture. Options include American cheese (yes, really—it melts like a dream), Monterey Jack, Havarti, or Fontina. They provide the fundamental “melt” that defines a grilled cheese.
The Flavor (Sharp, Distinctive Character): These cheeses bring personality and depth. Sharp cheddar delivers tangy boldness, Gruyere adds nutty sophistication, aged Gouda contributes sweet caramel notes, and Swiss provides subtle sweetness with those classic holes. This is where you define the sandwich’s character.
The Stretcher (The Cheese Pull Factor): For that Instagram-worthy cheese pull, include mozzarella or young Gouda. These cheeses have the protein structure that creates long, dramatic strings when you pull the sandwich apart. Low-moisture mozzarella works better than fresh for this application.
Three Winning Blends to Try:
Classic Comfort: 50% American + 50% Sharp Cheddar. The American guarantees perfect melting while the sharp cheddar brings the flavor. This combination never disappoints.
Gourmet Upgrade: 40% Gruyere + 40% Fontina + 20% Mozzarella. Sophisticated, nutty, creamy, and stretchy all at once. Pair with sourdough for an elevated experience.
Kid-Friendly Champion: 60% Mild Cheddar + 40% Monterey Jack. Approachable flavor with reliable melting and just enough cheese pull to make it fun.
Use approximately 3-4 ounces of cheese total per sandwich, distributed in 2-3 layers for optimal melting.
Step-by-Step: The Foolproof Grilled Cheese Method
Follow this technique exactly and you’ll achieve grilled cheese perfection every single time.
Equipment You’ll Need:
- Heavy-bottomed skillet or cast iron pan (for even heat distribution)
- Spatula
- Lid or foil (optional but recommended)
The Method:
Step 1: Butter your bread. Use softened butter and spread it all the way to the edges of each slice—those corners should be golden too. You want a generous, even coating. If using mayo, the same rule applies.
Step 2: Preheat your skillet over medium-low heat for 2-3 minutes. This ensures even heating and prevents hot spots that cause uneven browning. The pan should be warm, not screaming hot.
Step 3: Build your sandwich strategically. Place one slice of bread butter-side down in the pan. Add your cheese, layering it evenly and making sure it covers the entire surface. If using a cheese blend, alternate the types. Top with the second slice, butter-side up.
Step 4: Cover the pan with a lid for the first 3-4 minutes. This traps steam and heat, helping the cheese melt while the bottom turns golden brown. Listen for a gentle sizzle—not aggressive popping. Check the underside by lifting with a spatula; it should be evenly golden.
Step 5: Flip carefully when the first side is golden. Remove the lid and cook the second side uncovered for another 3-4 minutes. You can press down gently with your spatula to ensure good contact with the pan, but don’t smash it—you want the cheese to stay inside the bread.
Step 6: Check for doneness. Both sides should be crispy and golden brown, and the cheese should be fully melted. If the bread is perfect but the cheese needs more time, reduce heat to low and give it another minute with the lid on.
Pro Tips:
- If your cheese isn’t melting fast enough, add a tablespoon of water to the pan (not on the sandwich) and immediately cover with a lid. The steam accelerates melting.
- For extra insurance, you can briefly place the finished sandwich in a 300°F oven for 2 minutes to guarantee the center is molten.
- Let the sandwich rest for 30 seconds before cutting—this allows the cheese to set slightly and prevents it from all squirting out on the first bite.
Next-Level Variations & Add-Ins
Once you’ve mastered the classic, these upgrades transform grilled cheese from simple to spectacular.
Classic Upgrades
Ham & Cheese: Add 2-3 thin slices of quality deli ham between the cheese layers. The salty, savory ham complements the creamy cheese beautifully. This is essentially a Croque Monsieur without the bechamel.
Tomato & Basil: Layer thin slices of tomato (pat them dry first to prevent sogginess) and fresh basil leaves with mozzarella and sharp cheddar. The tomato adds freshness that cuts the richness.
Crispy Bacon: Cook bacon until crispy, then crumble and sprinkle between cheese layers, or lay whole strips across the cheese. The smoky, crunchy bacon adds textural contrast and savory depth.
Caramelized Onions: Sweet, jammy caramelized onions pair gorgeously with Gruyere or sharp cheddar. The sweetness balances the salty cheese in an addictive way.
Flavor Twists
Spicy Kick: Use pepper jack cheese or add thin slices of jalapeño for heat. A smear of chipotle mayo on the inside adds smoky spice.
Pesto Power: Spread a thin layer of basil pesto on the inside of the bread before adding cheese. It adds herbal brightness without making the sandwich soggy.
Apple & Cheddar: Thin slices of tart apple (like Granny Smith) with sharp cheddar create a sophisticated sweet-savory combination that’s surprisingly traditional.
Garlic Butter: Mix minced garlic or garlic powder into your softened butter before spreading. The aroma and flavor are incredible.
Dietary Adaptations
Dairy-Free/Vegan Option: Quality dairy-free cheese alternatives have improved dramatically. Look for varieties specifically labeled as “melts” (brands like Violife, Daiya, or Miyoko’s). Use vegan butter or olive oil for the bread. The cooking technique remains exactly the same, though some vegan cheeses benefit from slightly lower heat and longer cooking time to melt properly.
Gluten-Free: Use your favorite gluten-free bread. Because GF bread can be more delicate, be extra gentle when flipping, and consider reducing heat slightly to prevent excessive browning before the cheese melts.
Expert Tips, Troubleshooting & FAQs
Why Does My Bread Burn Before the Cheese Melts?
This is the most common grilled cheese mistake, and the answer is simple: your heat is too high. Reduce to medium-low or even low heat. Remember, you’re not in a rush. The extra couple of minutes ensures both elements reach perfection simultaneously. If your stove runs hot, medium-low might still be too much—adjust accordingly.
Can I Make Grilled Cheese Ahead of Time?
Grilled cheese is genuinely best enjoyed fresh from the pan when that cheese is at peak molten perfection. However, life happens, and sometimes you need to prepare ahead. If you must make it in advance, reheat in a skillet over medium-low heat for 2-3 minutes per side—this restores the crispy exterior. An air fryer at 350°F for 3-4 minutes also works well. Whatever you do, avoid the microwave, which turns the bread soggy and rubbery while creating unevenly heated, sometimes scorching hot cheese.
What to Serve with Grilled Cheese?
The classic, time-honored pairing is creamy tomato soup—the tangy, smooth soup complements the rich, crispy sandwich in a combination that’s pure comfort. Beyond soup, excellent sides include dill pickles (the acidity cuts the richness), crispy french fries, simple coleslaw, a light green salad with vinaigrette, or even ketchup for dipping if that’s your style. Keep sides light and acidic to balance the cheese.
Can I Make It Without Butter?
Absolutely. Mayonnaise is the most popular butter substitute and actually creates superior crispness. Avocado oil, olive oil, or even coconut oil work, though they impart different flavors. For a completely fat-free version, you can use a non-stick pan, though you’ll sacrifice significant flavor and texture—not generally recommended.
Can I Use an Air Fryer or Oven?
Yes, both work, though the technique differs slightly. For the oven, preheat to 400°F, butter both sides of the bread, and place the assembled sandwich on a baking sheet. Bake for 5-6 minutes, flip, then bake another 4-5 minutes until golden and the cheese melts. For the air fryer, preheat to 370°F and cook for 3-4 minutes per side, checking frequently as air fryer models vary significantly in heat intensity.
How Do I Prevent Soggy Bread?
Butter to the edges, use a sturdy bread like sourdough or thick-sliced white, and ensure your pan is properly preheated. If adding wet ingredients like tomatoes, pat them completely dry first. Also, don’t crowd the pan—proper air circulation helps moisture escape.
What’s the Best Pan for Grilled Cheese?
A heavy-bottomed skillet or cast iron pan distributes heat most evenly, preventing hot spots that cause uneven browning. Cast iron retains heat exceptionally well, which helps maintain consistent temperature even after adding the cold sandwich. Non-stick pans work fine and require less fat, but they don’t brown quite as beautifully as cast iron or stainless steel.
The Classic Grilled Cheese Recipe Card
Prep Time: 5 minutes
Cook Time: 8 minutes
Total Time: 13 minutes
Servings: 1 sandwich
Ingredients:
- 2 slices sourdough bread (or bread of choice)
- 2-3 tablespoons softened butter
- 3-4 ounces cheese (suggested blend: 2 oz sharp cheddar + 1.5 oz American + 0.5 oz mozzarella)
Instructions:
- Spread softened butter on one side of each bread slice, covering to the edges
- Preheat a heavy-bottomed skillet over medium-low heat for 2-3 minutes
- Place one bread slice butter-side down in the pan
- Layer cheese evenly over the bread
- Top with second bread slice, butter-side up
- Cover pan with lid and cook 3-4 minutes until bottom is golden brown
- Flip sandwich, remove lid, and cook uncovered 3-4 minutes more until second side is golden and cheese is fully melted
- Remove from heat, let rest 30 seconds, slice diagonally, and serve immediately
Notes: For extra melting insurance, add 1 tablespoon water to the pan (not on sandwich) and cover with lid for the last minute of cooking.
The perfect grilled cheese sandwich is within your reach. With the right ingredients, proper technique, and a little patience, you’ll create golden, crispy, gooey perfection every single time. Start with the classic method, then explore the variations to make this humble sandwich uniquely yours.
CLICK HERE FOR MORE BLOG POSTS
“In a world of instant takes and AI-generated noise, John Authers writes like a human. His words carry weight—not just from knowledge, but from care. Readers don’t come to him for headlines; they come for meaning. He doesn’t just explain what happened—he helps you understand why it matters. That’s what sets him apart.”
This was extremely well written and very helpful.
Your explanations are always spot-on.
This is the kind of content that keeps me coming back.
Наши специалисты используют эффективные методы детоксикации, которые помогают быстро устранить физическую тягу к наркотикам и нормализовать работу внутренних органов. Индивидуальный подход к каждому больному, грамотный подбор лекарственных средств и многолетний опыт врачей-наркологов гарантируют высокие результаты лечения. Здесь вы найдете всю необходимую информацию о том, как проходит детоксикация от наркотиков в нашем центре, какие методики применяются и почему так важно не откладывать обращение за профессиональной помощью. Мы также даем подробные рекомендации родственникам наркозависимых, помогая им правильно вести себя в кризисной ситуации и преодолеть страх осуждения. Мотивация больного на прохождение полного курса лечения — ключевой фактор, и наши психологи уделяют этому особое внимание.
Изучить вопрос глубже – [url=https://detoksikaciya-narkomanov-moskva13-1.ru/]stoimost-detoksikacii-ot-narkotikov-v-klinike[/url]
Вывод из запоя на дому подходит пациентам, которым необходимо получить помощь в привычной обстановке. Вызов врача можно заказать в любое время суток: выездная бригада приезжает по указанному адресу, проводит осмотр, оценивает давление, пульс, степень интоксикации, риск психозов, галлюцинаций, судорожных реакций, инфаркта, инсульта и других осложнений.
Детальнее – [url=https://vyvod-is-zapoya-sochi21.ru/]анонимный вывод из запоя в сочи[/url]
в таких случаях вызов нарколога на дом предоставляет возможность оценить состояние пациента и предложить амбулаторное лечение.
Исследовать вопрос подробнее – [url=https://narkolog-na-dom-kazan24.ru/]врач нарколог на дом[/url]
Наркологическая помощь позволяет безопасно начать выведение токсинов, снизить интоксикации, восстановить водно-солевой баланс и подобрать дальнейшее лечение алкогольной зависимости. Нарколог проводит анализ состояния пациента, уточняет стаж употребления спиртного, причины запоя, наличие хронического заболевания, психических расстройств, противопоказаний и других ограничений. После диагностики врач выбирает схему: амбулаторно на дому, в стационаре клиники или с госпитализацией.
Получить дополнительные сведения – [url=https://vyvod-is-zapoya-sochi22.ru/]нарколог на дом вывод из запоя[/url]