
From Faded Memories to Vivid Moments
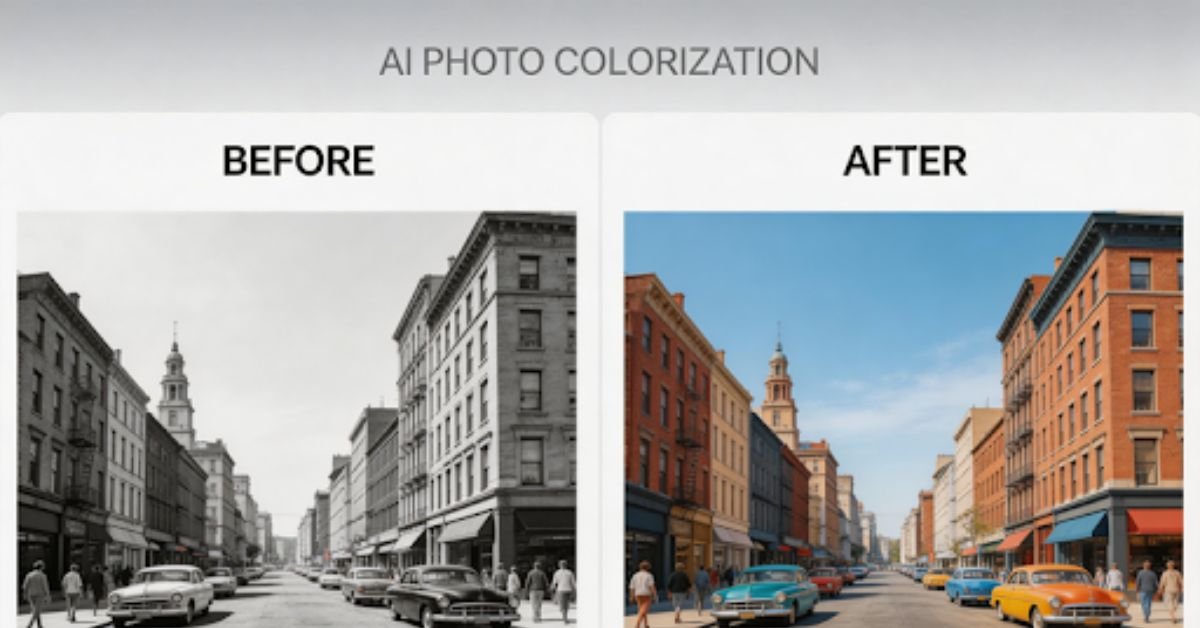
There’s something undeniably distant about black and white photographs. They feel frozen in time, disconnected from the vivid world we inhabit. When you look at a faded monochrome image of a family gathering, a wedding day, or a childhood moment, you can’t help but wonder: what did this scene actually look like in real life? What color was that dress? How blue was the sky? What warmth filled those faces?
For decades, colorizing black and white photos was an arduous process. It required professional Photoshop skills, countless hours of meticulous work, and a deep understanding of both art history and digital editing. But those days are gone. Today, artificial intelligence has transformed photo colorization from an expert-only craft into something anyone can do in seconds.
Why Colorizing Old Photos Matters
The emotional value of colorizing old photographs cannot be overstated. Black and white images, while artistically beautiful, often create a psychological barrier between the viewer and the moment captured. When you add color, something remarkable happens—memories become immediate and relatable.
Consider the difference when viewing an old family photo. In black and white, your grandmother’s smile is a historical artifact. In color, she becomes a real person whose eyes sparkle with recognizable warmth. The sepia tones that once felt nostalgic suddenly transform into living, breathing moments.
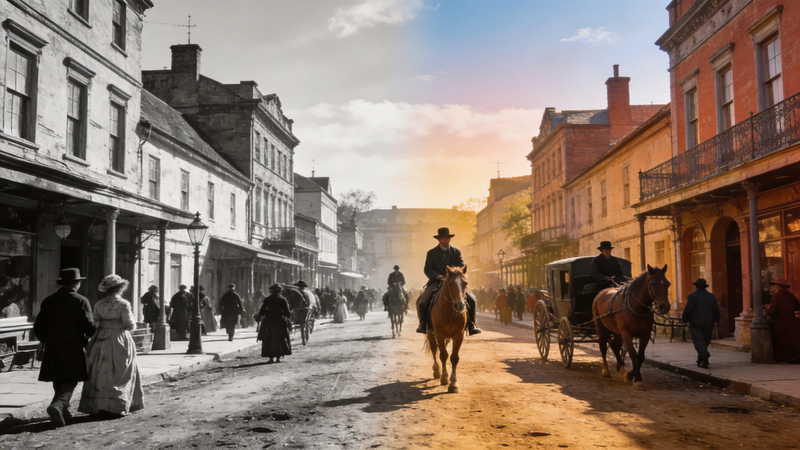
Colorization also enhances visual storytelling dramatically. Color adds depth, dimension, and detail that monochrome simply cannot convey. A blue sky, a red dress, green foliage—these elements provide context and realism that help viewers connect emotionally with the image.
Beyond realistic restoration, some users also explore creative transformations. For example, after colorizing a photo, you can use an image to pixel art tool or pixel art generator to turn historical images into stylized pixel artwork. This approach is popular for gaming avatars, digital art, and social media content, offering a fun and modern reinterpretation of classic memories.
How Automatic Photo Colorization Works
You might wonder how artificial intelligence can possibly know what colors to apply to a black and white photograph. The answer lies in machine learning and the power of massive datasets.
ModernAI image colorization tools are trained on millions of real-world color images. Through this extensive training, the neural network learns to recognize patterns—skin tones, natural environments, everyday objects, textures, and lighting conditions. When you upload a black and white photo, the AI analyzes the image content, identifies what it’s looking at (faces, clothing, buildings, nature), and predicts the most appropriate colors based on its learned knowledge.
The process is intelligent, not random. If the AI detects a human face, it applies natural skin tones. If it recognizes a sky, it adds appropriate blues and whites. If it identifies vegetation, it knows to use greens and earth tones. The system improves continuously as models are refined with more training data and better algorithms.
The key takeaway: AI colorization makes educated guesses based on real-world data, not arbitrary color choices. This is why modern tools can produce remarkably realistic results.
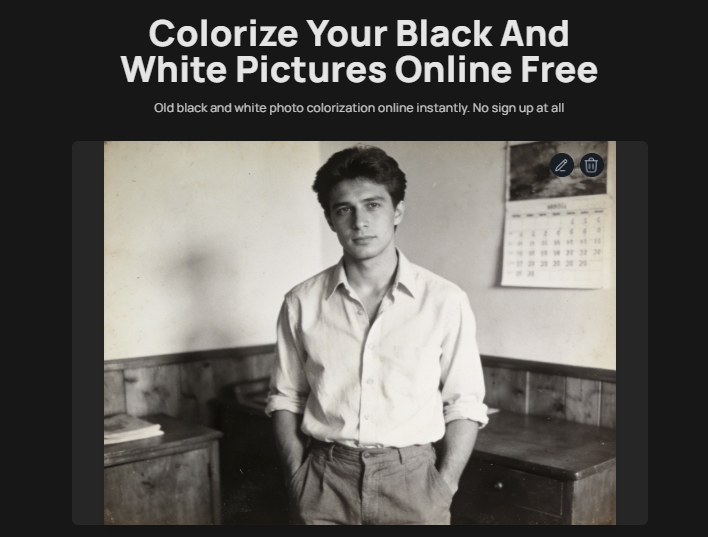
What is ImageColorizer
ImageColorizer is an AI-powered online platform designed specifically to colorize and restore old photographs. Built with advanced neural network technology, it transforms black and white images into vibrant, color-filled memories with just a few clicks.
What sets ImageColorizer apart is its comprehensive approach to photo revival. Beyond basic colorization, the platform offers intelligent features like facial enhancement, automatic scratch removal, image upscaling, and customizable prompts for fine-tuned results. Whether you’re working with a crisp digital scan or a damaged vintage photograph, ImageColorizer provides the tools needed to bring your images back to life.
The platform is designed with accessibility in mind—no technical expertise required, no software downloads necessary, and no expensive subscriptions. Simply upload your photo, let the AI work its magic, and download your revitalized image in seconds.
Step-by-Step: Turn Black and White Photos into Color
Ready to transform your own black and white photos? Here’s how to do it with ImageColorizer:
Step 1: Get Started
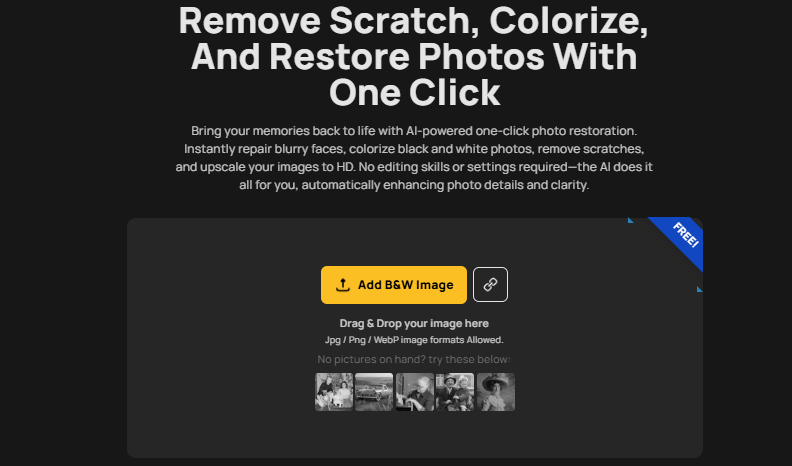
Visit imagetocolorizer.com and click the “Start New Colorizer” button on the homepage. This will take you directly to the colorization workspace where your transformation begins.
Step 2: Upload Your Black and White Photo
Click “Upload B&W Image” and select the black and white photograph you want to colorize. You can drag and drop your image directly into the upload box or browse your files to find it. The platform supports JPG, PNG, and other common image formats.
Step 3: Choose Your Colorization Mode
ImageColorizer offers two modes to suit your needs:
– Default Colorization: Perfect for quick, automatic results with no adjustments needed.
– Customized Colorization: Offers additional control with prompt-based adjustments.
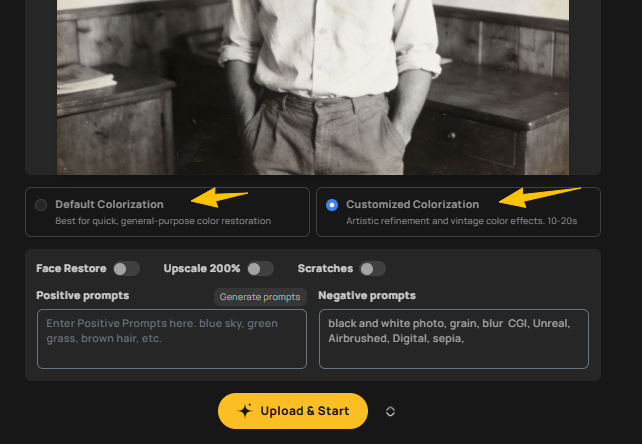
For most users, Default Colorization delivers excellent results right out of the box. If you choose Customized Colorization, click “Generate Prompts” in the “Positive Prompts” section. The AI will automatically generate descriptive prompts based on your image, but you can edit these to better match your vision.
Step 4: Select Enhancement Options
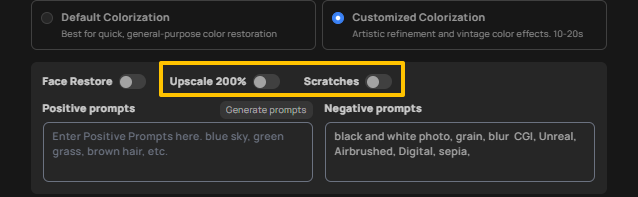
Before processing, you can choose from several powerful enhancement features:
– Face Restore: Sharpen and enhance facial details for more lifelike results
– Upscale 200%: Double your image resolution for clearer, more detailed output
– Scratch Removal: Automatically repair cracks, scratches, and surface damage
Select the options that best suit your photo’s condition, then click “Upload & Start” to begin the colorization process.
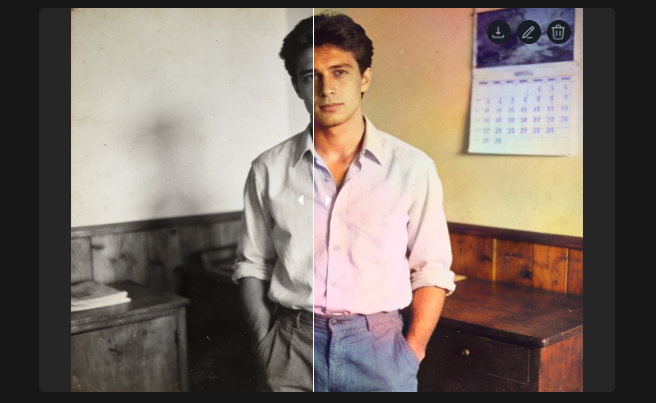
Step 5: Review and Download
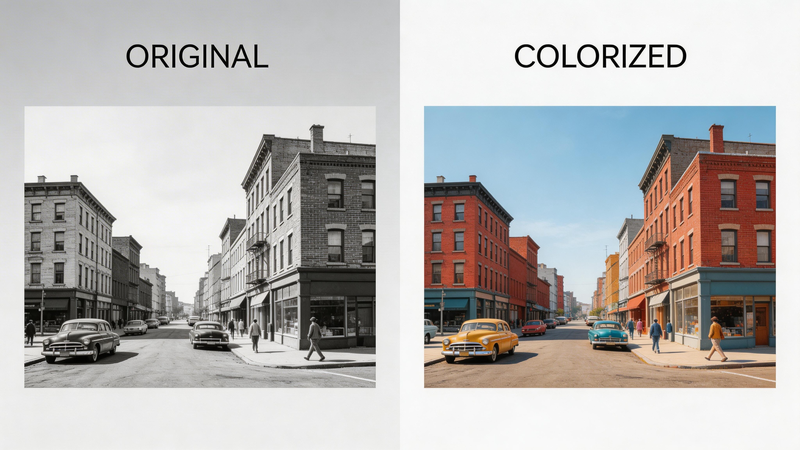
Within seconds, ImageColorizer will process your image and present a side-by-side before-and-after comparison. You can clearly see the transformation from black and white to full color.
To save your colorized photo, click the download icon in the top-right corner of the image. If you’d like to make additional adjustments, click the pencil icon to access editing tools for rotation, cropping, filters, and text overlays. When satisfied with your edits, click “Done” to finalize and save your changes.
That’s it—your faded memory is now a vivid, color-rich image ready to share and treasure.
What Makes a Good Colorized Photo?
Not all colorized photos are created equal. Understanding what quality looks like will help you evaluate results and choose the right tools.
Natural Skin Tones: The most critical element in photo colorization is realistic skin tone quality. Poor colorization often produces orange, pink, or grayish skin. High-quality results should display natural, varied skin tones that look authentic and believable.
Balanced Colors: Good photo colorization doesn’t oversaturate. Colors should feel muted and natural, not neon-bright. The sky should be a realistic blue, grass should be a natural green, and clothing colors should fit the era and context of the photograph.
Preserved Details: Quality colorization maintains the sharpness and detail of the original image. Beware of tools that blur faces, lose texture in clothing, or create artifacts around edges. The AI should enhance the image without degrading its clarity.
Consistency Across the Image: Each element in the photo should relate naturally to the others. Shadows, highlights, and color temperature should be consistent throughout the image, creating a cohesive visual result rather than a patchwork of disconnected colors.
When these elements come together, a colorized photo transcends simple restoration—it becomes a bridge between past and present, making history feel immediate and alive.
Tips for Best Results (Quick Checklist)
Follow these simple guidelines to achieve stunning colorization results:
– Use High-Quality Scans: Scan your photos at the highest resolution possible (300 DPI or higher). More detail in the original means better colorization results.
– Avoid Extremely Small Images: Very low-resolution photos (under 500px in any dimension) lack sufficient detail for quality AI colorization.
– Fix Scratches First: If your photo has significant damage, consider using scratch removal tools before colorizing, or enable ImageColorizer’s built-in scratch removal feature.
– Test Multiple Images: When colorizing a batch of photos, process a few test images first to evaluate results and adjust your approach if needed.
– Choose HD Output: Always opt for tools that support high-definition output to preserve and enhance image quality.
Remember: better input equals better output. Taking time to prepare your images properly will dramatically improve your final results.
Conclusion: Bring Your Memories to Life
The transformation from black and white to color is nothing short of magical. Faded, distant memories suddenly become vivid, relatable moments. A grandmother’s smile becomes warm and familiar. A childhood scene springs to life with authentic colors. History feels immediate and personal.
The best part? You don’t need special skills. You don’t need hours of time. You don’t need expensive software. With AI-powered tools like ImageColorizer, anyone can transform old photos in seconds.Your family memories deserve to be seen in full color. They deserve to feel real, immediate, and alive. Go to colorize a B&W photo today and experience the difference for yourself. You might just discover that the past is closer than you ever imagined.
ALSO READ: Recreate Any AI Art Using Image to Prompt Tools