
Nose drawing sits at the center of portraiture, character design, and realistic illustration. In 2026, with digital tools, AI references, and better anatomy understanding widely available, artists have more resources than ever to master this feature.
This guide walks you through anatomy basics, step-by-step methods for front, side, and 3/4 views, shading techniques, common pitfalls, style variations, and practical exercises. You’ll gain the confidence to draw noses that actually look three-dimensional and unique to each face.
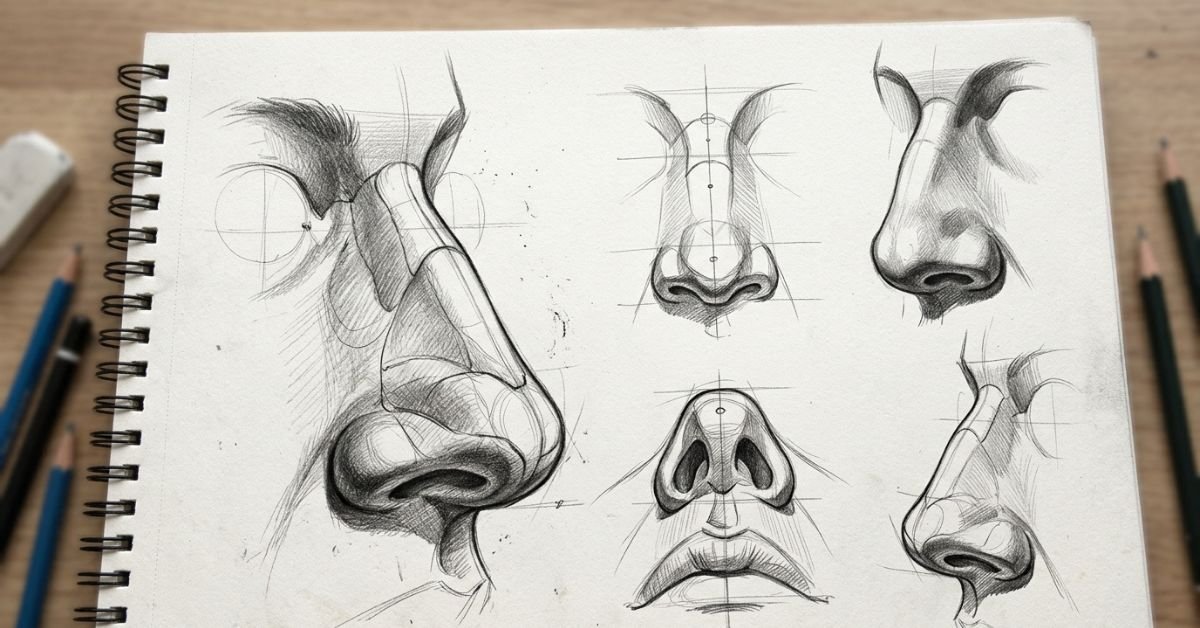
Nose Anatomy: Understanding What You’re Drawing
The nose isn’t a flat triangle or a random blob. It has distinct parts built from bone, cartilage, and soft tissue.
Key structures:
- Bridge (nasal bone) Upper bony part.
- Tip (lower lateral cartilages) The rounded end.
- Alae (wings) The sides that flare around the nostrils.
- Nostrils and septum The openings and central divider.
- Philtrum The groove running from nose to upper lip (helps with placement).
Thinking in 3D forms a wedge or pyramid for the overall shape, spheres or balls for the tip and wings makes it far easier to rotate and light from any angle.
Step-by-Step: How to Draw a Nose (Front View)
Basic method (great for beginners):
Focus on light construction lines first. The nostrils rarely need hard dark lines they’re usually defined by shadow.
Drawing Noses from Different Angles
Profile (Side View): The nose becomes a strong triangular or curved shape. Pay attention to how much it projects from the face and the shape of the bridge.
3/4 View: Often the trickiest. Use a wedge or trapezoid base, add the tip ball, and carefully foreshorten one side. The far nostril often hides partially.
Looking Up/Down: Extreme angles change everything the underside becomes visible with more nostril emphasis.
Pro tip: Use simple 3D forms and perspective lines to build consistency across angles.
Shading and Rendering for Realism
Good shading sells the 3D form. Identify your light source and build values gradually:
- Darkest areas: Underside of the tip, inside nostrils (subtly), and where the bridge meets the face.
- Midtones: Sides of the bridge and wings.
- Highlights: Top of the bridge and tip (if oily/shiny skin).
Blend smoothly for skin texture. Use hatching, stippling, or smooth gradients depending on your medium (pencil, digital, charcoal).
Nose Drawing Comparison Table
| View | Key Challenge | Best Construction Shape | Common Mistake |
|---|---|---|---|
| Front | Nostril placement & symmetry | Circle + guidelines | Over-dark nostril outlines |
| Profile | Projection & bridge curve | Triangle/wedge | Flat, no protrusion |
| 3/4 | Foreshortening | Wedge + spheres | Asymmetrical or warped sides |
| Up/Down | Underside visibility | Inverted pyramid | Ignoring perspective |
Common Mistakes and How to Fix Them
- Treating the nose as 2D lines instead of 3D form.
- Making nostrils too dark or prominent.
- Wrong proportions (noses are roughly as long as the distance from brow to chin in many faces but vary widely).
- Ignoring how the nose connects to the brow ridge and cheeks.
- Drawing every nose the same (diversity in width, length, bridge height, and tip shape matters).
Myth vs Fact
- Myth: All noses follow the same formula. Fact: Ethnic and individual variation is huge study references from many backgrounds.
- Myth: You need to outline everything. Fact: Soft edges and value changes create more realism.
- Myth: Noses are hard to stylize. Fact: Once you know the structure, simplifying for anime, cartoon, or comic styles becomes easy.
Tools, References, and Practice Tips
Use photo references, 3D models (like on Sketchfab), or life drawing. In 2026, many artists combine traditional sketching with digital refinement on tablets like Wacom or XPPen.
Practice by doing 30-second gesture noses, then longer studies. Draw the same nose under different lighting. Track your progress you’ll improve faster than you expect.
EEAT Insights: Years of Teaching Portraiture
Having taught drawing fundamentals and critiqued thousands of student portraits over the years, the biggest “aha” moment for most people is shifting from copying lines to understanding the underlying 3D structure. The common mistake I see in 2025-2026 workshops? Rushing straight to details instead of nailing proportions and form first. Students who spend time on construction and value studies see the fastest jumps in realism. Always draw from multiple real references rather than relying solely on imagination early on.
FAQs
How do you draw a nose for beginners?
Start simple: Use a circle for the tip, add bridge guidelines, and build soft shapes. Focus on basic proportions before details. Practice front view first.
What is the easiest way to draw a realistic nose?
Break it into basic 3D forms (spheres and wedges), then shade according to a single light source. Avoid heavy outlines on the sides and nostrils.
How do you draw a nose from the side?
Sketch the bridge curve and projection first, then add the tip and nostril shape. Pay attention to how far it sticks out from the face.
Why do my drawn noses look flat?
You’re probably missing strong value contrast and clear light/shadow separation. Add more dimension with midtones and cast shadows.
How do you draw different nose shapes?
Study variations in bridge height, width, tip roundness, and nostril flare. References from diverse ethnicities help hugely.
Conclusion
Mastering nose drawing comes down to anatomy understanding, solid construction, thoughtful shading, and lots of deliberate practice across angles and styles. From basic ball-and-wedge methods to advanced realistic rendering, these skills transfer directly to stronger portraits and character art.As tools and references evolve in 2026, the fundamentals remain the same: observe, construct, and refine. Keep drawing daily, experiment with different mediums, and don’t fear “bad” noses they’re all part of the process.
CLICK HERE FOR MORE BLOG POSTS
“In a world of instant takes and AI-generated noise, John Authers writes like a human. His words carry weight—not just from knowledge, but from care. Readers don’t come to him for headlines; they come for meaning. He doesn’t just explain what happened—he helps you understand why it matters. That’s what sets him apart.”